PART 1: HTML in WordPress
Do you have a little experience with WordPress? But now you want to dig a little deeper and get a look under the hood? Let’s take a step beyond simply publishing a page, uploading images and installing plugins.
In this beginner tutorial, we’ll focus on HTML and CSS. In related tutorials, we’ll peek at PHP & JavaScript and also Files, Folders & Templates.
Do you need to know HTML and CSS to use WordPress?
No. But the more you know, the better off you’ll be at managing your WordPress website (self-hosted version). We won’t dig too deep, just enough to get a little dirty.
 As you probably already know, WordPress has an admin side (dashboard) for creating and editing content, and a front end that your site visitors see.
You can create a WordPress website without knowing how to code by selecting a theme, publishing pages, creating a custom menu and adding pages to that menu.
But sooner or later, you’ll want to tweak your site or solve a problem.
You have to understand the files and code just enough to pull this off. By going under the hood, you’ll take a giant leap forward and be better prepared if you’re ever confronted with the dreaded “white screen of death.”
Ready? Let’s start digging.
You may not know that WordPress is built upon mainly three languages, PHP, CSS and HTML. JavaScript is gaining increasing importance too.
Why learn HTML when you can already publish posts and pages? Learning basic HTML (along with CSS) will help you gain greater control over the look of your individual posts and pages.
What is HTML?

HTML is the main language used to create web pages. It’s all about organizing and controlling how your website content is displayed. Its purpose is to apply meaning, not presentation. Using HTML elements, you can define content as paragraphs, headings, lists, links, images etc..
How to View HTML in WordPress
You may already be familiar with HTML if you’ve written a WordPress post and switched to your Code editor in your WordPress Gutenberg editor.
(FYI: The WordPress Gutenberg editor for posts and pages can be found when you go to Admin > Posts > Add New or Admin > Pages > Add New.)
Go to your WordPress admin section (dashboard) and edit a post or page you’ve written.
- Open the post/page editor.
- Look to the right in the top navbar.
- Click the three dots. You’ll see “More tools & options.”
- In the drop-down panel, click Code editor.
Do you see a lot of angle brackets < >? You’re looking at HTML.
How to recognize HTML (syntax)
HTML is all about elements and tags. HTML elements are the building blocks of HTML pages. An HTML element generally consists of a start tag, content and an end tag.
- HTML tags normally come in pairs like <p> and </p>.
- The first tag in a pair is the start tag. The second one is the end tag.
- The end tag has angle brackets like the start tag, but also has a forward slash inserted before the tag name.
<h1>This is a Heading</h1>
<a href=”https://www.crimsondesigns.com“> This is a link.</a>
- The <h1> element is used to define a large heading.
- The <a> element defines a link.
- The <img> element defines an image. (It doesn’t come in a pair. There is no end tag.)
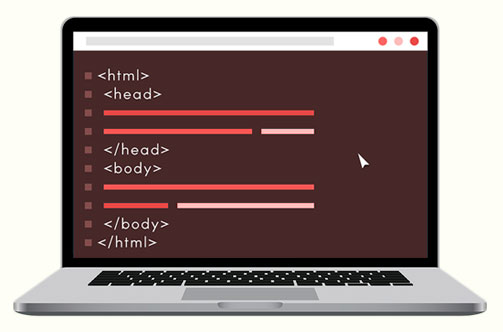
In a web page (source code), you may notice that <html> is the opening tag. It starts things off and tells the browser that everything between that and the </html> closing tag is an HTML document.
The content between <body> and </body> is the main content that will appear in the web browser screen.

To learn the nitty-gritty details of HTML, read: Smooth Strides from HTML to HTML5.
Web Browsers and HTML
Keep in mind, web browsers (ex. Chrome, Firefox) do not display HTML tags, but use them to determine how to display the document. Web browsers read HTML documents and display them on a screen.
Did you know?
Did you know that if you work strictly in your WordPress VISUAL Editor (Gutenberg), you’re still adding HTML to your post? It is just taking place “under the hood” where you can’t see it.
Once you make the move to the Code editor, you will be taking your first step towards better WordPress management and you’ll gain some HTML skills. Of course, you can switch back and forth between the Visual editor and the Code editor.
Go ahead and practice.
Add a new post, write something in the Gutenberg Visual editor, make something bold (strong) and then take a peek at the Code editor to see the HTML. Keep the post as a draft and try to make some changes in the Code editor. Have some fun with it!
In your Code editor, you’ll likely see <h1> tags, <a> tags, <img> tags and <strong> tags.
CODE/ VISUAL Editors in a Nutshell
Basically, the Code editor shows you the HTML markup. The Visual editor does its best to interpret that HTML markup and present it to you similar to the way it will look in a web browser. By switching to the Code editor, you can add your own custom styling to your content.
You’re off to a great start now. Let’s move on to CSS.


Return to Top